9. How to show category/categories/subcategories and category banner
10. How to enable product attribute swatches.
11. How to create a size guide table
12. What is WooCommerce?
13. Wordpress & Woocommerce resources
14. WooCommerce Guided Tour
15. Outdated WooCommerce Templates
16. Child theme
17. Fatal error: Uncaught Error: Call to undefined method WC_Product_Variable::get_gallery_image_ids()
18. Eva Updates History
1. Theme Installation
Thank you for choosing Eva Theme!
1.1 Theme Requirements
In order to proceed with the theme installation, you need to make sure you have the latest version of WordPress (4.7) on your website site. The theme has been built to work with the latest version of WooCommerce (2.6.x)
1.2 Downloading From Themeforest and Installation
Upon downloading the "package.zip" file from Themeforest, you'll have all files you need inside. Extract the "package.zip" file and inside you will find the theme zip file called "eva.zip", that is the file you need to install.
Please Note: You can install the theme in two ways: through Wordpress, or via FTP. If you have trouble installing the theme via Wordpress, please proceed with installing it via FTP and you will be able to get around the issue.
1.2.1 Wordpress Installation
Follow the steps below to install via Wordpress.
Navigate to Appearance > Themes.
Click Install Themes and hit the upload button.
Navigate to find the "eva.zip" file on your computer and click "Install Now" button.
The theme will be uploaded and installed.
Activate the newly installed theme. Go to Appearance > Themes and activate the installed theme.
1.2.2 FTP Installation
Follow the steps below to install via FTP.
Log into your hosting space via an FTP software
Unzip the eva.zip file and ONLY use the extracted woodstock theme folder
Upload the extracted woodstock theme folder into wp-content > themes in your wordpress installation
Activate the newly installed theme. Go to Appearance > Themes and activate the installed theme.
1.4 Install Recommended/Premium Plugins
Now that you have activated Eva theme, you will see a notice at the top of the screen. This notice is to let you know about the plugins that we recommend you install for use with the theme. Click ‘Begin installing plugins’ and install/activate the plugins one by one. You can also access this page by going to Appearance > Install Plugins.
NOTE: Installing the Redux Framework, Eva Theme Extensions and Visual Composer plugin are required.
2. Demo Content Import
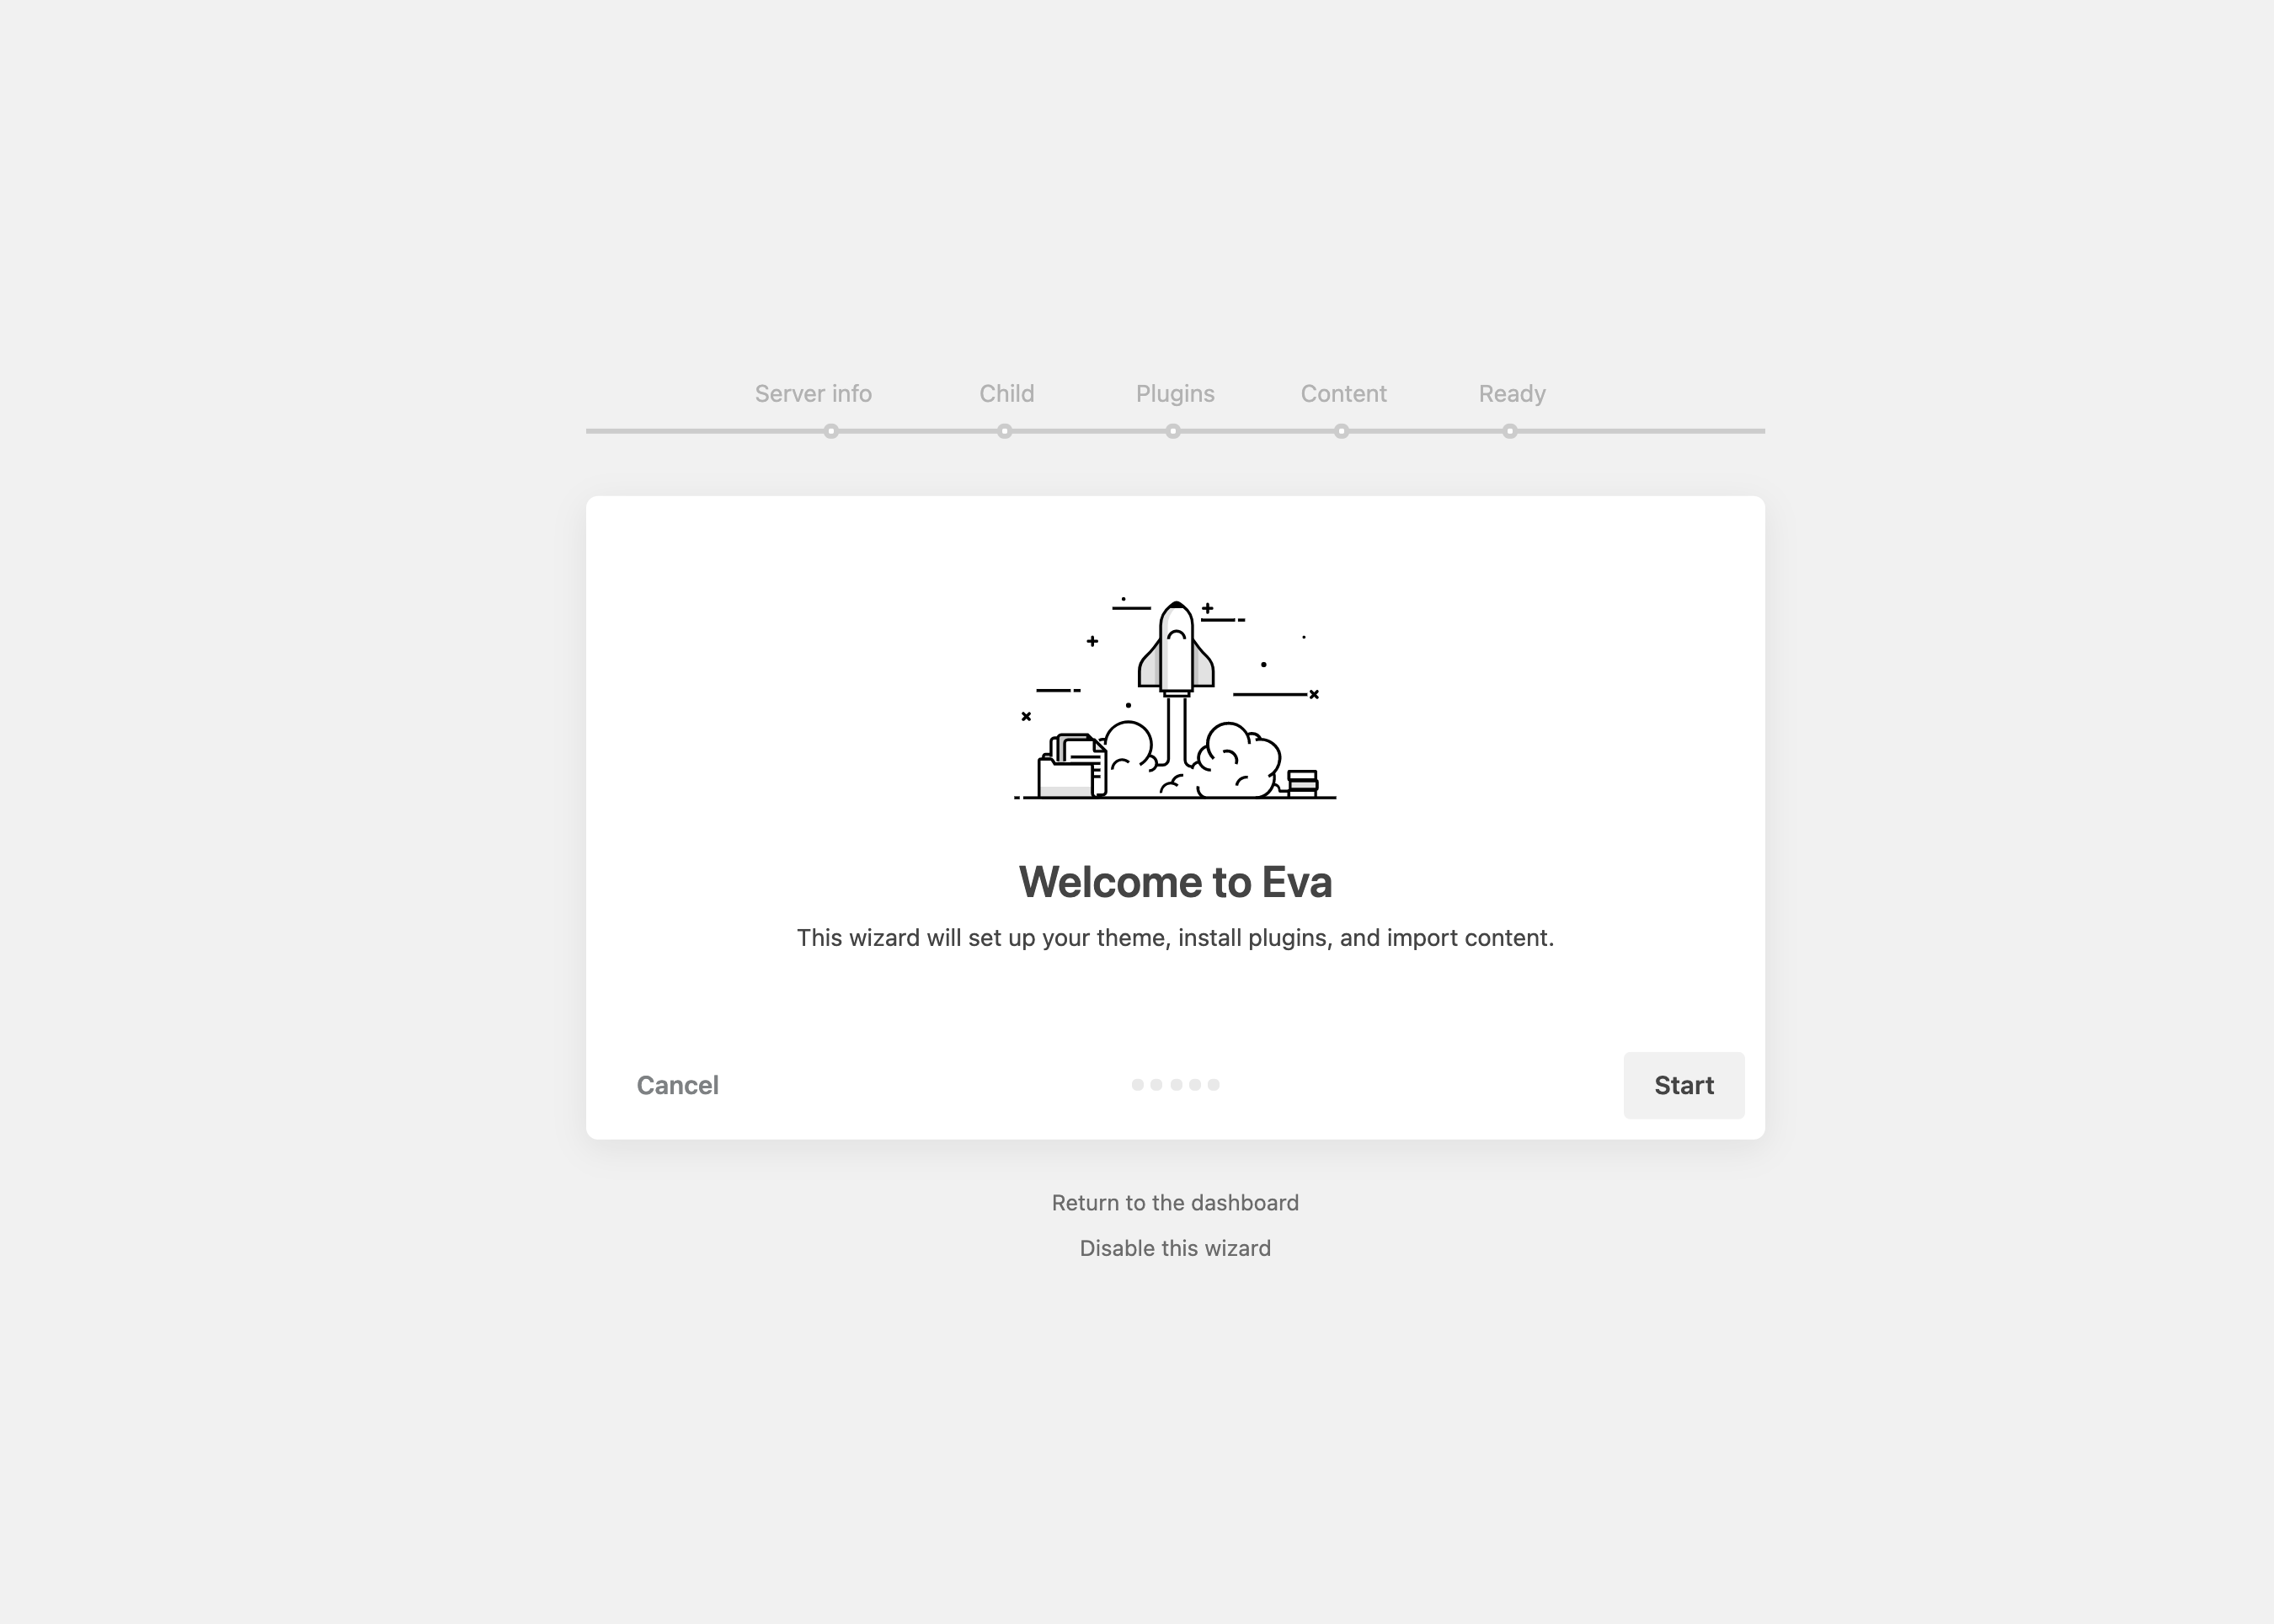
The Setup Wizard
The theme comes with a setup wizard making it really easy to install the plugins coming with it and import the demo content in two simple steps. As soon as the theme is activated, the setup wizard will start automatically.
This is what you should be seeing on your screen:
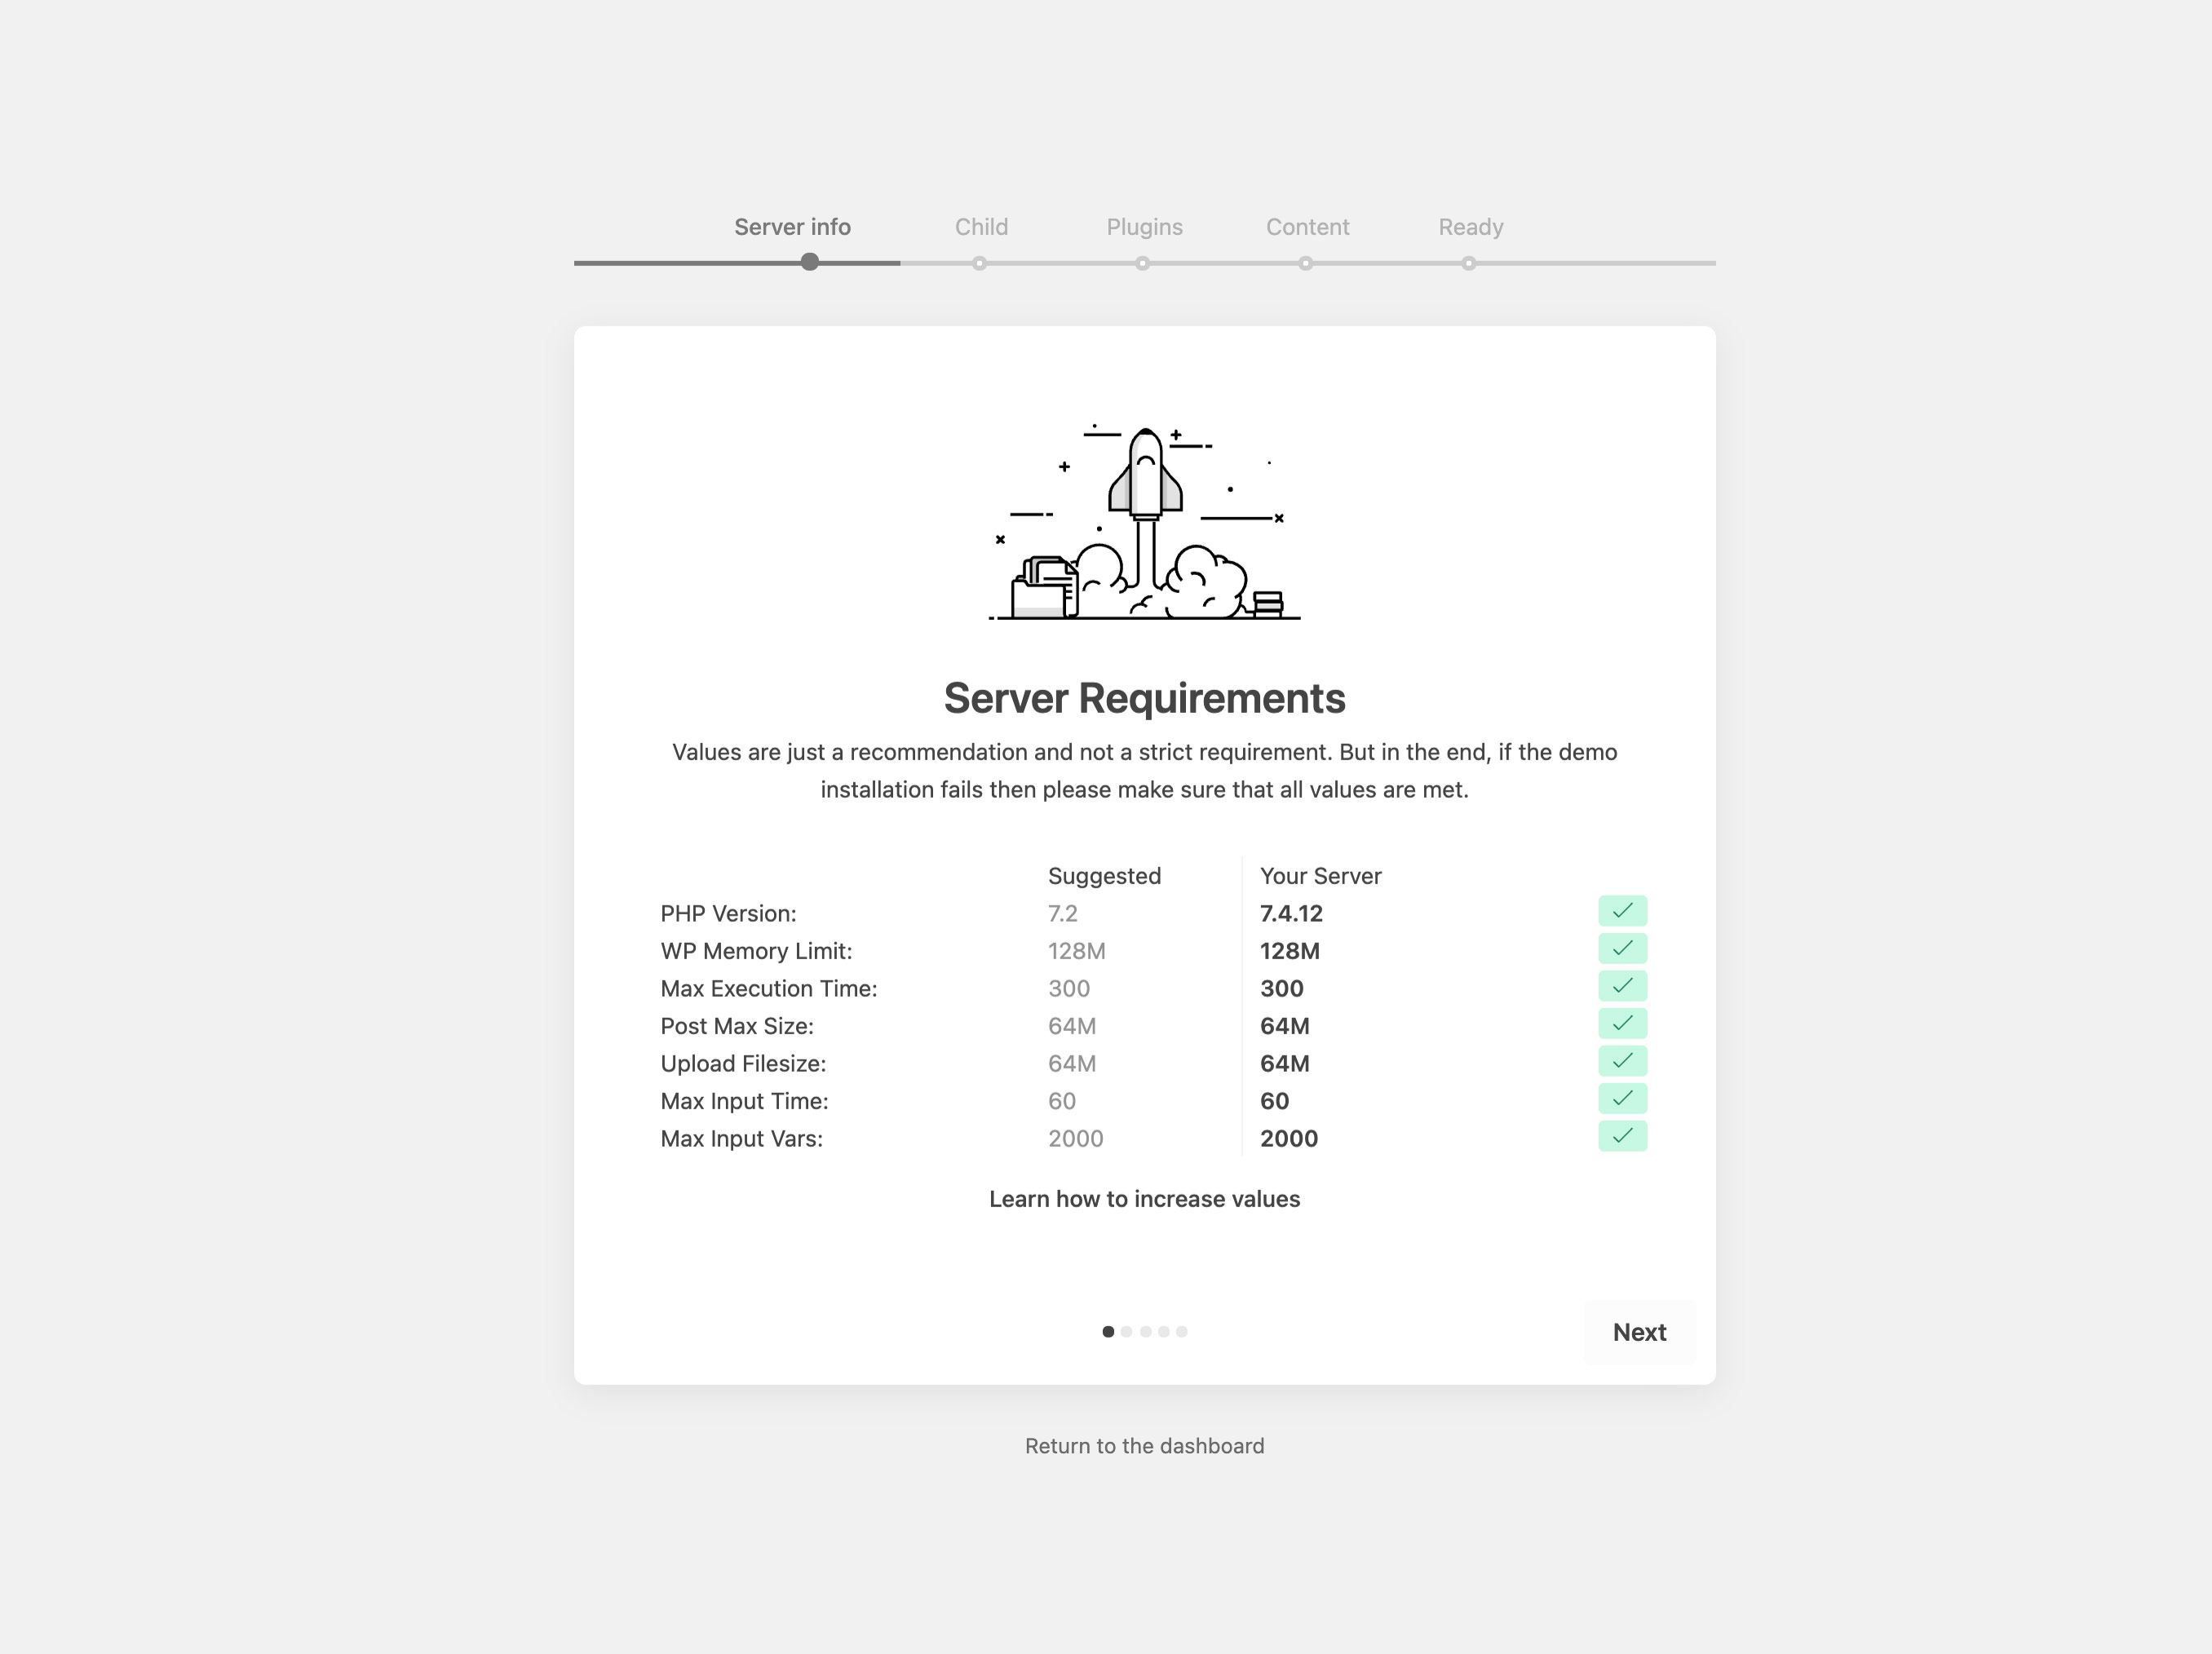
Setup Wizard Step 1: Server Requirements
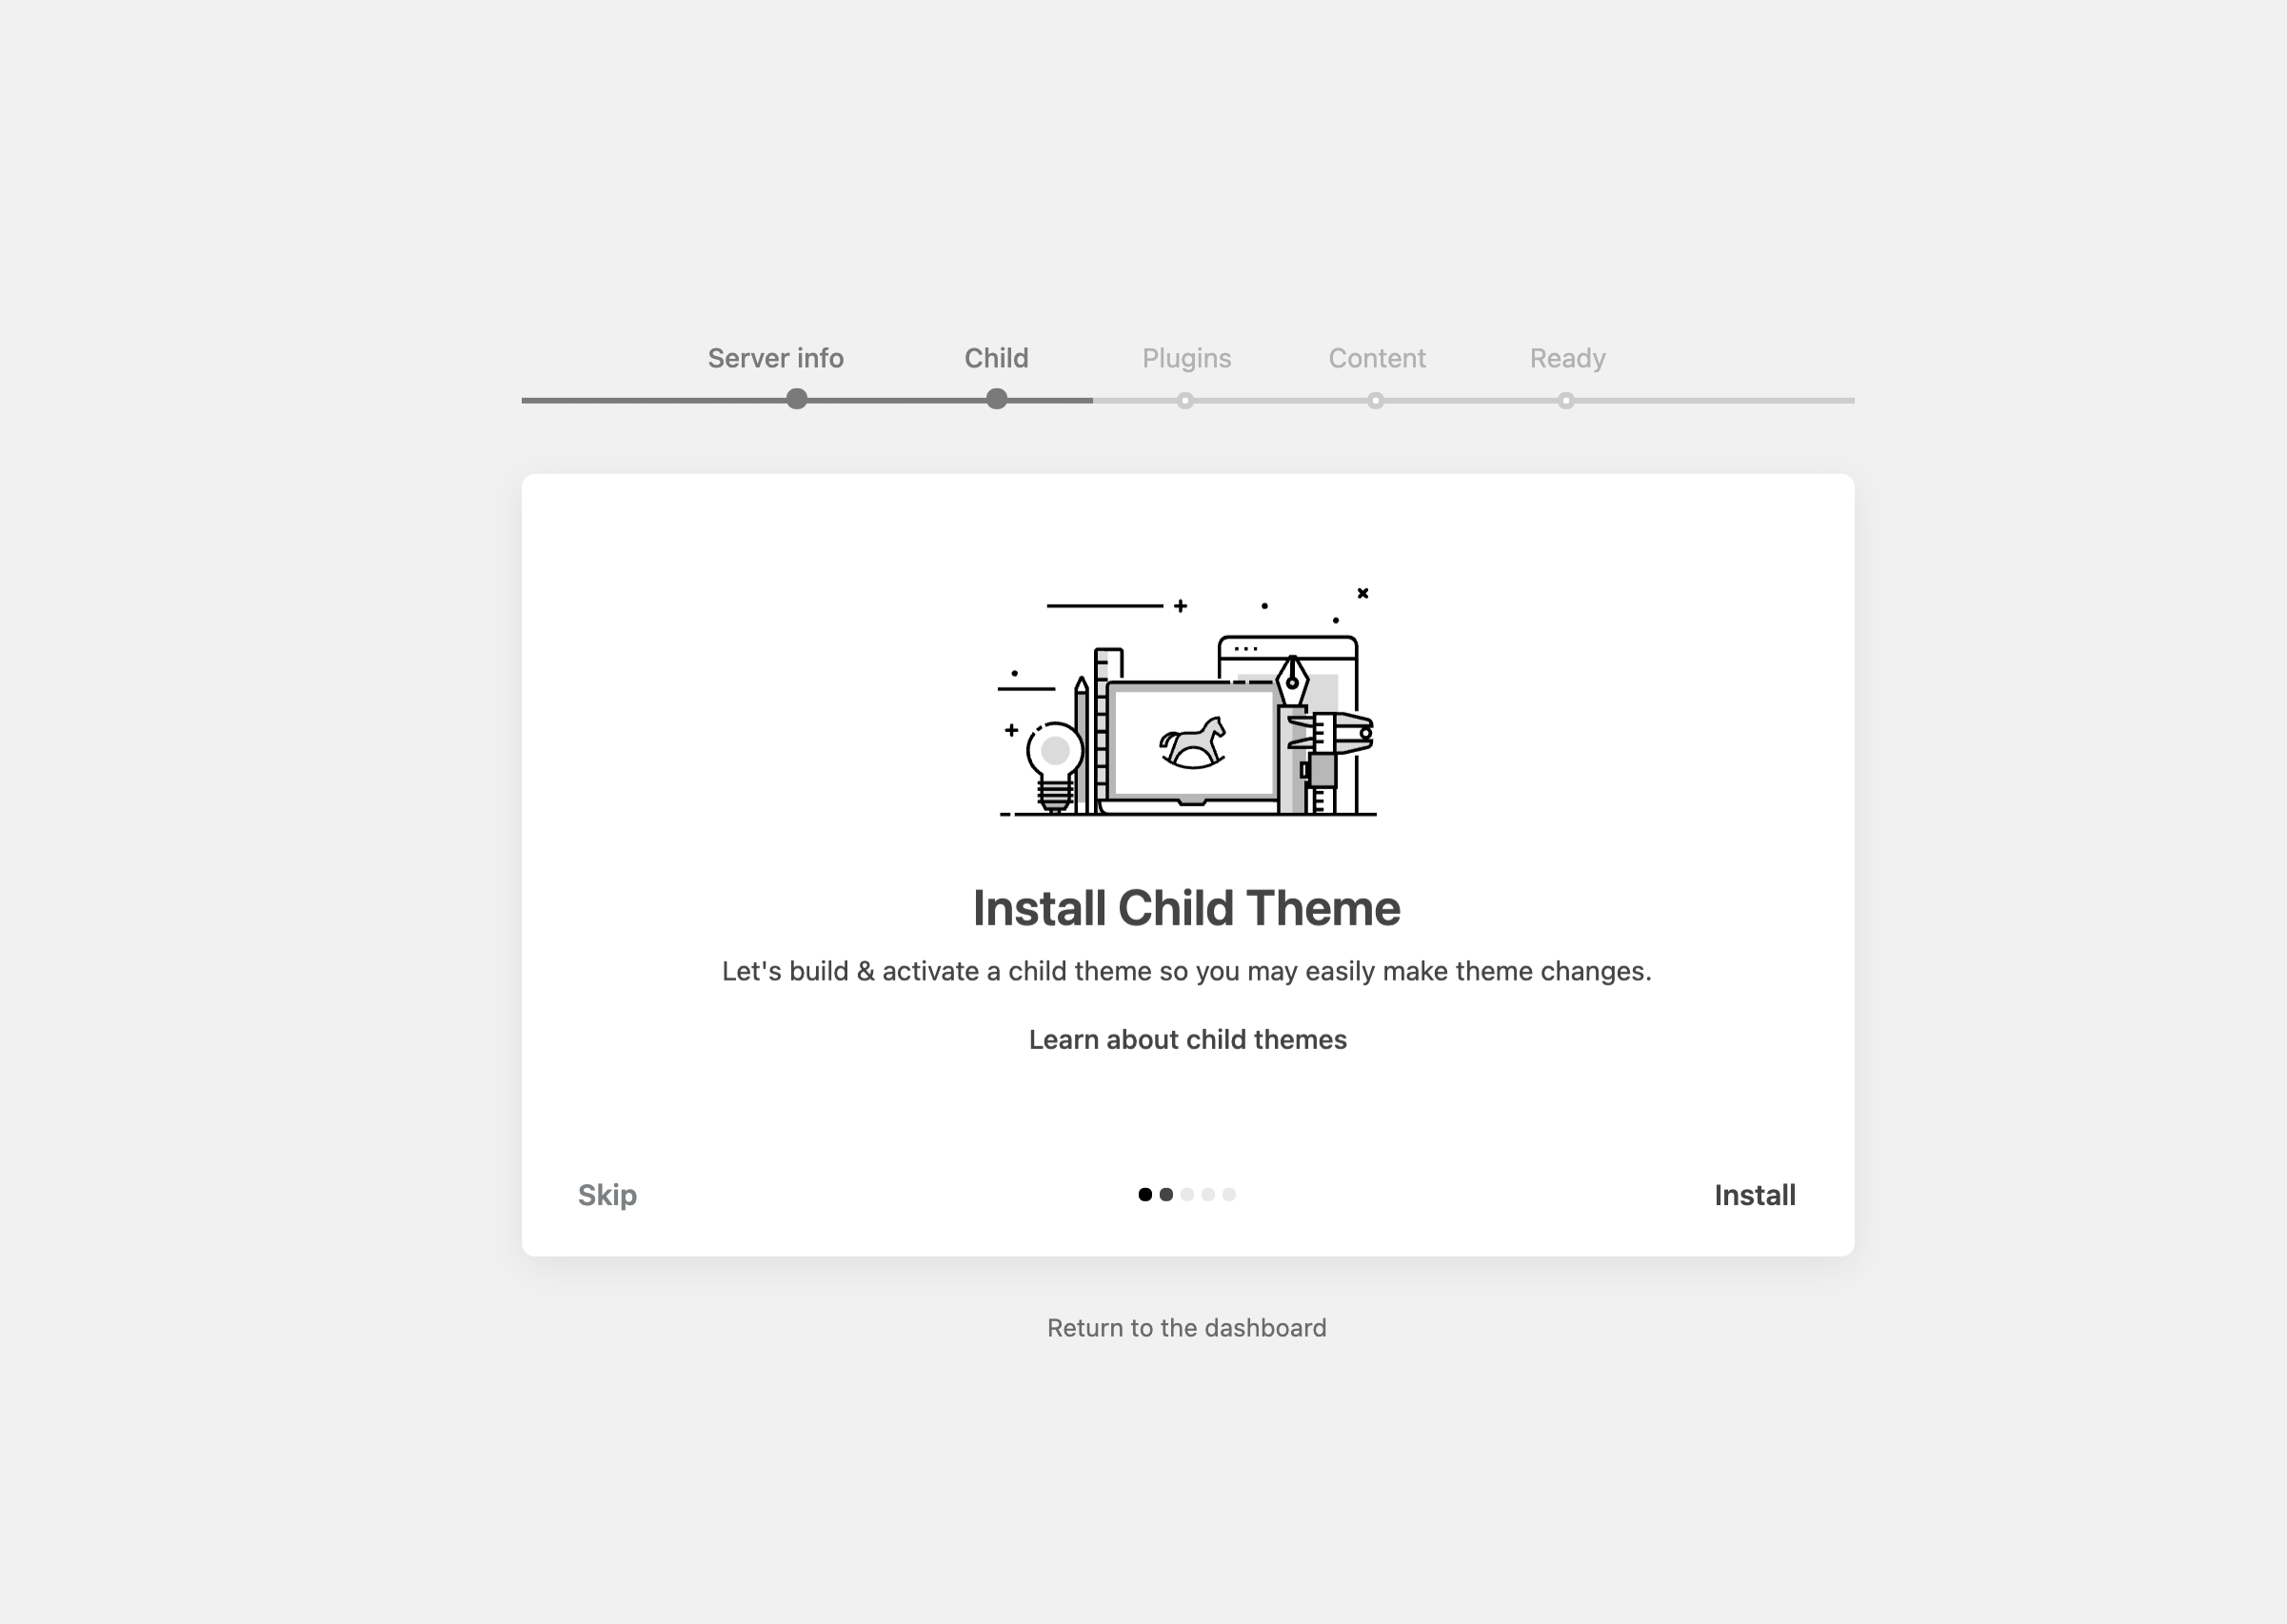
Setup Wizard Step 2: Install Child Theme
Setup Wizard Step 3: Install Plugins
The following plugins are required by the theme’s demo imported, so it can import dummy content in the next step.
Setup Wizard Step 4: Import Content
The importer will help you start with the pre-built layouts from the demo and dummy content such as product pages, blog posts and widgets. In case you're using the theme on an existing site you may not want to import the demo content. In that case, simply skip this step.
You can start working on your site now
Good luck with your project!
Alternative Importing Method
If the one click demo import does not complete or takes too long, you most likely have a memory limit on your server as explained above. Here is another method to try.
Go to Tools -> Import
Choose “WordPress” from the list.
Upload the demo content .xml using the form provided on that page. The xml file can be found in the theme folder in /Demo Content/fashion
You will be asked to map the authors in this export file to users on the blog. For each author, you may choose to map to an existing user on the blog or to create a new user.
You will then have the choice to import attachments, so click on the “Download and import file attachments” box.
If the import does not fully complete, repeat these steps again as many times as necessary until you receive the Success message.
3. Update theme
1. Update using FTP
Please note: make a backup of the theme prior to updating.
The theme is located in wp-content/themes/eva.
Go to http://themeforest.net/downloads to download latest version of the theme. The theme is located inside the downloaded zip in "Theme files" folder.
Copy eva folder into wp-content/themes/ folder. Make sure this folder is named "eva" (replace with old).
It seems scary but you really won’t loose any of your data. The only exception is if you have made edits to theme files like header.php, footer.php etc. These changes will need to made again to the new files. But all of your content and theme settings are preserved.
NOTE: If you did some customization/code changes directly in our theme files you might loose them after updating all files.
We suggest you to customize our theme using child theme and don’t change actual theme files as this will make it easier to update your parent theme.
2. Update using WordPress Envato Market (Automatic Updates)
The Envato Market plugin can install WordPress themes and plugins purchased from ThemeForest & CodeCanyon by connecting with the Envato Market API using a secure OAuth personal token. Once your themes & plugins are installed WordPress will periodically check for updates, so keeping your items up to date is as simple as a few clicks.
You can add a global token to connect all your items from your account, and/or connect directly with a specific item using a singe-use token & item ID. When the global token and single-use token are set for the same item, the single-use token will be used to communicate with the API.
2.1 Installing the Envato Market plugin
The latest version of the Envato Market plugin comes with theme. After install and activating the plugin, click on the “Envato Market” icon from the left sidebar. Here you have two options:
Global OAuth Personal Token
Single Use OAuth Personal Tokens: This works for individual items and additionally requires the Envato Market item ID. This is useful for a freelancer who has installed themes and/or plugins on a client site.
To generate your personal token, click on this link & login using your Envato Market login details.
Copy & paste your unique token into the Envato settings inside your WordPress dashboard.
Click on “Save Changes”.
Once you have configured this properly, you will see a screen where you can install or update your already purchased plugins & themes.
4. Theme Options
The theme comes with a theme options panel, which is packed with a lot of useful options, that let you easily customize the theme, without having to manually change anything in the source files. The options panel is found under the Theme Options of your WordPress admin panel menu.
Some Options screenshots:
General Settings
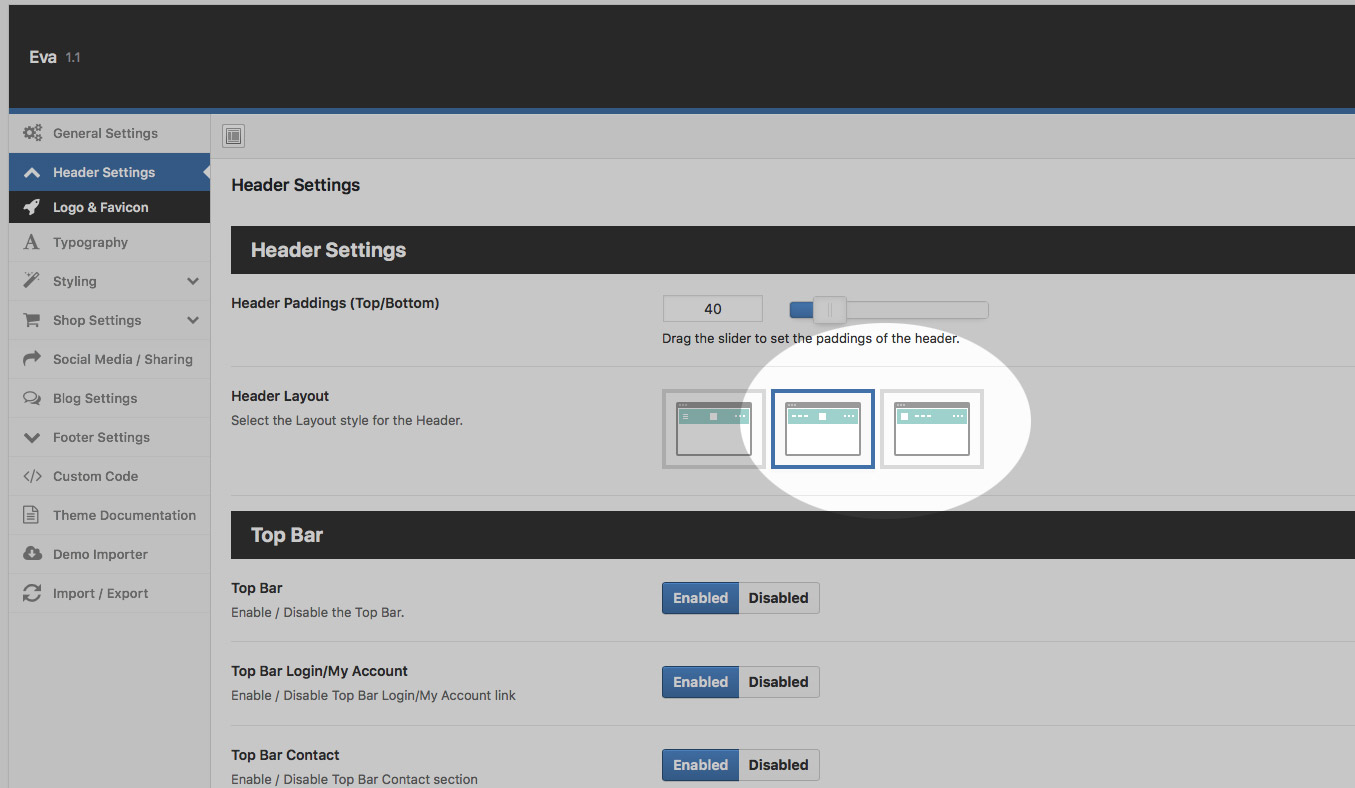
Header Settings and Logo Settings
Typography
Styling Settings
Shop Settings
Social Media / Sharing
Blog Settings
Footer Settings
Typography
5. Navigation
Header Layout
First check that you have selected 2 or 3 layout of header layout.
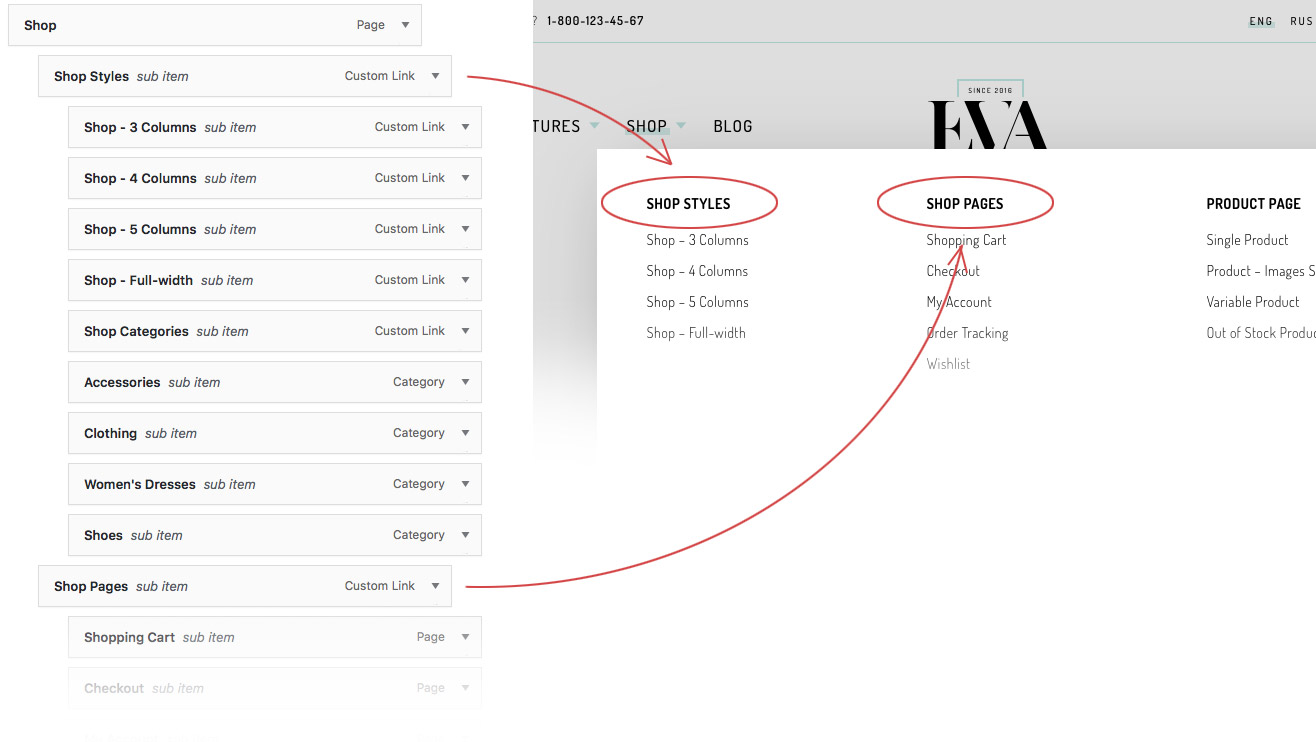
How to set up multi-column drop down menus?
When editing the main navigation in the WordPress menu editor, click the item you'd like to open up a multi-column drop-down menu and type in "mega-menu" in the CSS Classes box, as you can see in this screenshot:
Then start organizing your multi-level navigation menu:
Cannot find the CSS Classes field?
Head on to the "Screen Option" button at the top of the page and make sure the "CSS Classes" filed is checked to be shown on the screen.
How to add a background image in the drop-down?
For the items set to display a multi-column drop-down menu, you can set a background image. Simply paste in the image URL in the Background URL box.
6. Pages
1. Page templates
Here is a list of pages templates that are included in this theme
Default template
- Default content template.
Full Width Page
- 100% width template. Use this if you want to have full-width content
Narrow Page
- Narrow width template. Use this if you want to have narrow content
Page with Right Sidebar
- Default content with a right sidebar
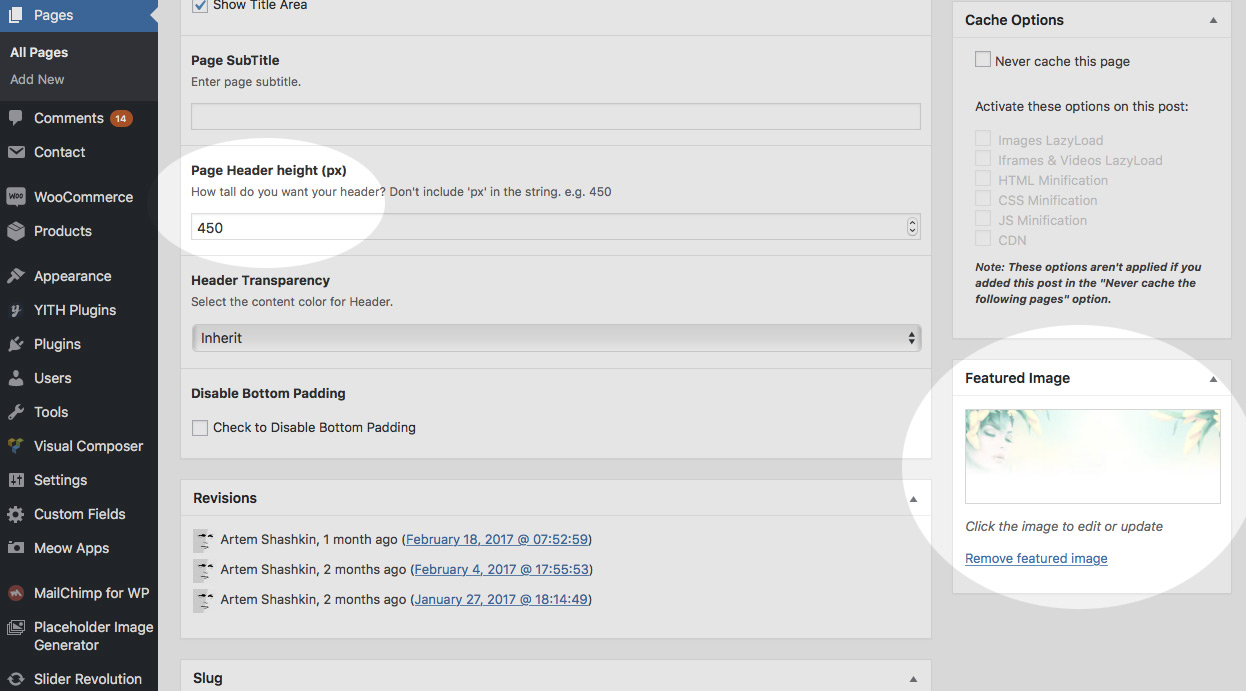
2. Page settings
You can setup page title area, page subtitle, top/bottom padding.
3. Homepage/Blog setup
Go to Settings > Reading
Select "A static page"
For Front page select the Homepage page you want in the select box.
For Post page select a page called "Blog".
7. Shortcodes
Visual Composer is a premium drag drop plugin that comes bundled with the theme. It provides 40+ elements that can be easily added to your page. In addition to extending functionalities of existing elements, Eva theme has added additional elements. With this set of elements, you will be able to create unlimited varities of pages.
The Visual Composerplugin comes bundled with the theme. We'll always make sure to include the latest version in the main theme package so you can update yours.
8. Widgets
1. Widget areas
Here is a list of pages templates that are included in this theme
Sidebar
The default sidebar visible on Blog and Pages with sidebar template
Shop Sidebar
Sidebar for shop category pages. Visible if category with sidebar is selected in Theme Option Panel
Footer 1 - 5
Sidebars for footer area. Visible if footer sidebars is selected in Theme Option Panel
2. Custom Sidebars with Woosidebars plugin
With WooSidebars you can override any widgetized area on your WordPress-powered website, displaying different widgets for different screens... without touching a line of code.
9. How to show category/categories/subcategories and category banner
First go to the Appearance -> Customize -> Woocommerce -> Product Catalog and select 'Show categories & products' in Shop Page Display or Category Display drop menu.
How to add Header Banner for Shop
Open Shop page for edit and add Feature image for header banner. Also you can enter header height in Page Header height input.
How to add Header Banner for Product Category
Go to the Products -> Categories and add/edit category and select image for Image Header section.
10. How to enable product attribute swatches.
First please activate WCBoost - Variation Swatches plugin. Then go to the Products -> Attributes section and select attribute for edit and select swatch type for it (Color, for example)
Then configure terms for current attribute.
How to enable product attribute below product item?
This feature only applies to variable products. Go to Theme Settings > Shop Settings > Shop Catalog > Product Attribute to select the attribute you want to show on.
You can change the attribute for a product you want. Edit a variable product > Product Attribute tab and select the attribute you want to show.
How to show attribute swatches widget on sidebar?
Go to the Appearance -> Widgets section and add EvaAttributes Filter widget
How to show the selected attribute's label?
Navigate to Appearance -> Customizer -> WooCommerce -> Variation Swatches and check "Show the selected attribute's label"
11. How to create a size guide table
This function can be activated in Theme Settings -> Shop Settings -> Product Page -> Size Chart. Then, you can create new tables in Dashboard -> Size Guides. Each size guide table you can attach to particular product categories while editing them or to some specific products when you edit these products. You can also put any content like text or pictures that will be displayed before the size table.
12. What is WooCommerce?
The world's favorite eCommerce solution that gives both store owners and developers complete control. Sell anything. Beautifully. Get started for free.
WordPress for Beginners 2015
- WordPress for Beginners 2015 is a course specifically designed by the great folks from WordPress Informer for those who want to learn WordPress step-by-step, from the very beginning.
WooThemes Documentation - Documentation, Reference Materials, and Tutorials for your WooThemes products
WooCommerce Guided Tour - This series of videos covers anything and everything you'd need to know about installing & setting up WooCommerce.
14. WooCommerce Guided Tour
This collection of videos covers anything and everything you'd need to know about installing, setting up WooCommerce, creating products, getting paid, and more!
In case you're seeing a notification in your administration dashboard saying the theme includes some outdated WooCommerce templates, it means you've recently updated WooCommerce but haven't updated the theme yet.
Updating the theme to its latest version will fix the outdated templates.
16. Child theme
A child theme is a theme that inherits the functions and styles of the other theme, called the parent theme. Child themes are the recommended way of modifying an existing theme. My theme has full support for creating child theme.
17. Fatal error: Uncaught Error: Call to undefined method WC_Product_Variable::get_gallery_image_ids()
Issue:
Since upgrading my category or product page shows this error: Fatal error: Uncaught Error: Call to undefined method WC_Product_Variable::get_gallery_image_ids()
Solution:
Please make sure both the theme and WooCommerce are updated to their latest version. The latest version of Eva is always compatible with the latest version of WooCommerce. If the problem persist make sure it's not a plugin that's causing it. Something that may not be yet compatible with your current version of WooCommerce. You can test that by deactivating all 3rd party plugins then run another test.
18. Eva Updates History
Version 1.9.9.91
— February 27, 2024
Fixed: Product page tabs
Updated: WooCommerce 8.6.1 support.
Updated: Bundled plugins
Version 1.9.9.90
— November 13, 2023
Updated: WooCommerce 8.2.2 support
Updated: Bundled plugins
Version 1.9.9.89
— August 4, 2023
Updated: WooCommerce 7.9.0 support.
Updated: Bundled plugins
Version 1.9.9.88
— June 29, 2023
Updated: WooCommerce 7.8.1 support.
Updated: Bundled plugins
Version 1.9.9.87
— May 7, 2023
Updated: Bundled plugins
Version 1.9.9.85
— February 16, 2023
Fixed: Twitter share
Updated: WooCommerce 7.4.0 support.
Updated: Bundled plugins
Version 1.9.9.84
— January 25, 2023
Fixed: Demo import
Updated: WooCommerce 7.3.0 support.
Updated: Bundled plugins
Minor bug fixes
Version 1.9.9.83
— November 2, 2022
Updated: WooCommerce 7.0.1 support.
Updated: Bundled plugins
Version 1.9.9.82
— October 23, 2022
Added: WooCommerce 7 support.
Updated: Bundled plugins
Version 1.9.9.81
— June 3, 2022
Fixed: Problem with shop thumbnails. The options at Appearance > Customize > WooCommerce > Product Images now work correctly. If necessary run the thumbnails regeneration function WooCommerce > Status > Tools > Regenerate shop thumbnails
Added: Autoplay in Categories Thumbs WP bakery page builder slider element
Updated:WooCommerce 4.6 support
Updated: Bundled plugins
Minor bug fixes
Version 1.9.4
— August 26, 2020
Updated:WooCommerce 4.4 support
Updated: Bundled plugins
Minor bug fixes
Version 1.9.3
— July 28, 2020
Fixed: theme translations
Updated: Bundled plugins
Minor bug fixes
Version 1.9.2
— June 11, 2020
Updated: WooCommerce 4.2 support
Updated: Footer instagram (display likes/comments counter. Now you can show instagram feed by tag)
Updated: Bundled plugins
Minor bug fixes
Version 1.9.1
— April 2, 2020
Updated: Footer Instagram Feed (Please check your Instagram Feed Settings in Theme Settings -> Footer)
Version 1.9
— March 31, 2020
Updated: WooCommerce 4.x support
Updated: Bundled Plugins
Minor bug fixes
Version 1.8.9
— January 27, 2020
Updated: WooCommerce 3.9 support
Updated Bundled plugins
Minor bug fixes
Version 1.8.8
— December 25, 2019
Updated: WooCommerce 3.8 support
Updated: Rebuild Size Guide, now you can add more than one size guide for different product categories or for different products separately. Please move the old size chart to the new section. Instructions how to create size guide here https://temashdesign.ticksy.com/article/15532/
Updated: Eva attribute filter widget for images and labels
Updated: Yith Wishlist 3.x version support
Updated Bundled plugins
Minor bug fixes
Version 1.8.7
— August 31, 2019
WooCommerce 3.7 support
fixed: Rebuild Instagram footer section (WP Instagram Widget plugin no need anymore)
fixed: RTL styles
Updated Bundled plugins
Minor bug fixes
Version 1.8.6
— June 27, 2019
updated: Bundled plugins
fixed: RTL styles
added: WhatsApp icon to Social Media
added: Display contact info in mobile (off-canvas menu)
fixed: Minor bug fixes
Version 1.8.5
— April 23, 2019
updated: WooCommerce 3.6 support
updated: Bundled plugins
fixed: Minor bug fixes
Version 1.8.4
— December 18, 2018
Wordpress 5 support
WooCommerce 3.5.2 support
Updated Bundled plugins
Minor bug fixes
Version 1.8.3
— November 7, 2018
WooCommerce 3.5.1 support
Added Back to top button
Updated Bundled plugins
Minor bug fixes
Version 1.8.2
— August 19, 2018
WooCommerce 3.4.4 support
Fixed: product category header with attribute selected
Added: Hide price in Catalog Mode from Theme Settings Section
Updated Bundled plugins
Minor bug fixes
Version 1.8.1
— June 11, 2018
Fixed: Adding to cart for simple product from single product page
Minor bug fixes
Version 1.8
— May 28, 2018
WooCommerce 3.4 support
Fixed: removing products from mini cart
Fixed: RTL css in child-theme
Updated Bundled plugins
Minor bug fixes
Version 1.7
— April 2, 2018
WooCommerce 3.3.4 support
Fixed: off-canvas mini cart
Fixed: RTL offcanvas
Fixed: woocommerce notice
Fixed: add to cart / remove ajax requests
Fixed: header parallax
Fixed: product search widget
Updated Bundled plugins
Minor bug fixes
Version 1.6
— February 14, 2018
WooCommerce 3.3.x support
Added telegram to social media & sharing
Rebuilded Product Categories Thumbs Visual Composer element
Added Product Categories Thumbs slider
Updated Bundled plugins
Minor bug fixes
Version 1.5
— December 10, 2017
Added attribute swatches support
Replaced single product gallery
Added gallery thumbnails for mobile
Added product video support
Fixed dropdown navigation for 2 and 3 header layout
Fixed RTL styles
Fixed subscribe input issue
Updated Bundled plugins
Minor bug fixes
Version 1.4
— October 22, 2017
WooCommerce 3.2.x support
Fixed google map
Fixed RTL styles
Fixed off-canvas navigation
Added ability to disable instagram feed for custom pages
Updated Bundled plugins
Minor bug fixes
Version 1.3
— September 18, 2017
Added RTL support
Fixed Pinterest share
Fixed woocommerce currency switcher
Fixed mobile scroll issue
Updated Bundled plugins
Minor bug fixes
Version 1.2
— July 11, 2017
WooCommerce 3.1.0 support
Fixed Password protected page form
Fixed External/Affiliate product button link
Added ability for edit sizes for main logo, sticky header logo and mobile logo from Theme Options Panel
Added Custom Content for Top Bar Contact section
Added ability to disable Product Gallery Lightbox, Review tab on single product page
Updated Bundled plugins
Minor bug fixes
Version 1.1
— May 30, 2017
Updated: Latest WooCommerce 3.0.7 support
Updated: Bundled plugins
Added: New header styles with classic navigation
Added: Header Topbar
Fixed: Order by in Visual Composer shortcodes
Minor bug fixes
Version 1.0.5
— April 18, 2017
WooCommerce 3.0.3 support
Fixed Display All product categories in shop catalog
Fixed Display subcategories
Added Color content elements scheme switcher from Theme Options
Added ability to choose background color for website
Fixed Featured products slider (Visual Composer element)
Minor bug fixes
Version 1.0.4
— April 9, 2017
Fixed 500 error when using child-theme
Version 1.0.3
— April 7, 2017
WooCommerce 3.0 support
Fixed Google social icon link
Fixed Quick View in Catalog mode
Updated Bundled plugins
Minor bug fixes
Version 1.0.2
— February 25, 2017
Fixed languages/currency switcher
Fixed Cart page on mobile
Fixed removing product from mini cart animation
Minor bug fixes
Version 1.0.1
— February 21, 2017
Fixed empty product Categories placeholders
Added Ajax Add to Cart and Ajax Removing products from mini cart